Simulate or Automate Mouse Actions on Windows
This page displays screenshots of how you can Automate / Simulate Mouse Actions like Mouse Movement, Mouse Dragging, etc. on Windows. Left Click, Right Click, Screen Touch and other Mouse Automation actions are available which you can combine to create required Mouse Automation Script. Yes there are lots of other Mouse Automation Actions which you can use, however given below Scripts should give you a good idea as to how you can combine various Mouse Automation Actions in the Script and perform required Mouse Cursor Automation.
Click at Current Mouse Cursor Location
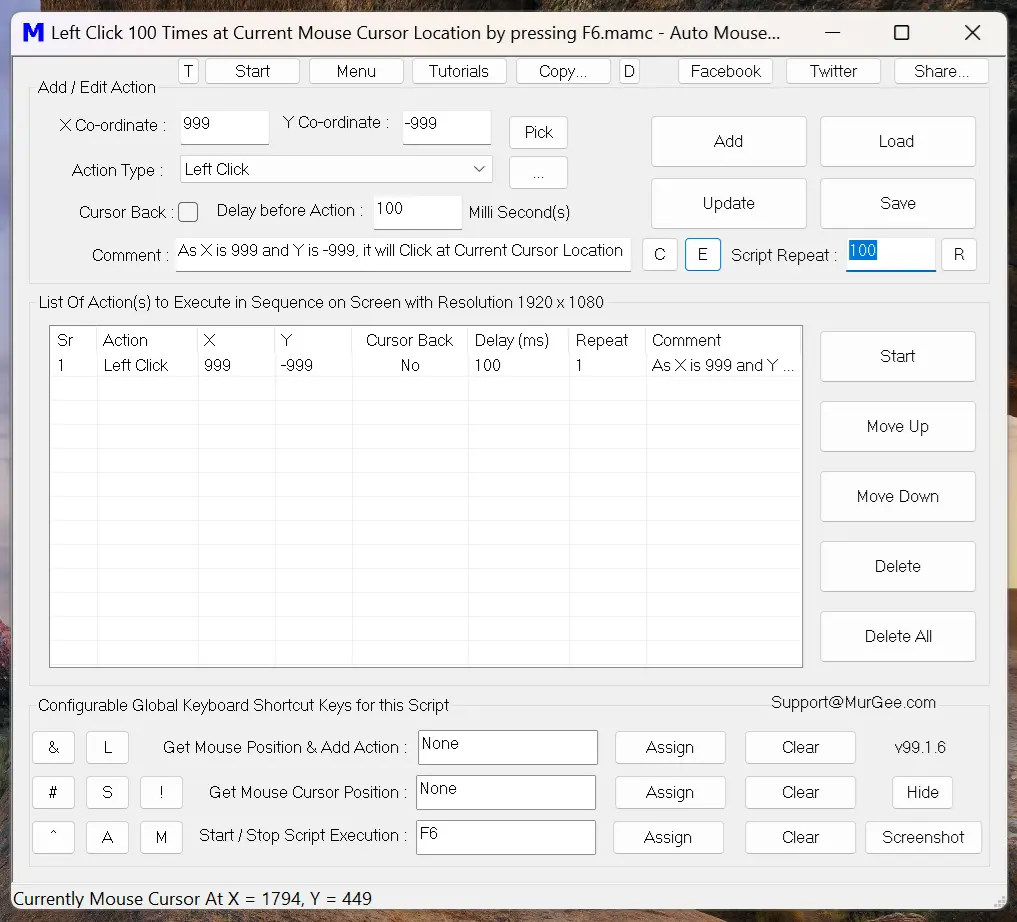
To Automate Mouse Click at current Mouse Cursor Location, you can add a Left Click at X = 999 and Y = -999. The Screenshot below displays a Script which will Click at current Mouse Cursor Location 100 times which is configured using Script Repeat Count. The special location of X = 999 and Y = -999 to perform Mouse Automation at Current Mouse Cursor Location for selected Action can be used for other types of Mouse Actions like Right Click, Middle Click, etc. Also note in the screenshot below, the Keyboard Shortcut F6 is configured to start the script execution. When the configured Keyboard Shortcut is pressed while the Script is running, the Script will stop execution. The Time delay for action is configured as 100 Milli Seconds which can be reduced for faster script execution or can be increased for slower script execution.
Drag Mouse Cursor in a Shape (Circle, Rectangle or Ellipse)
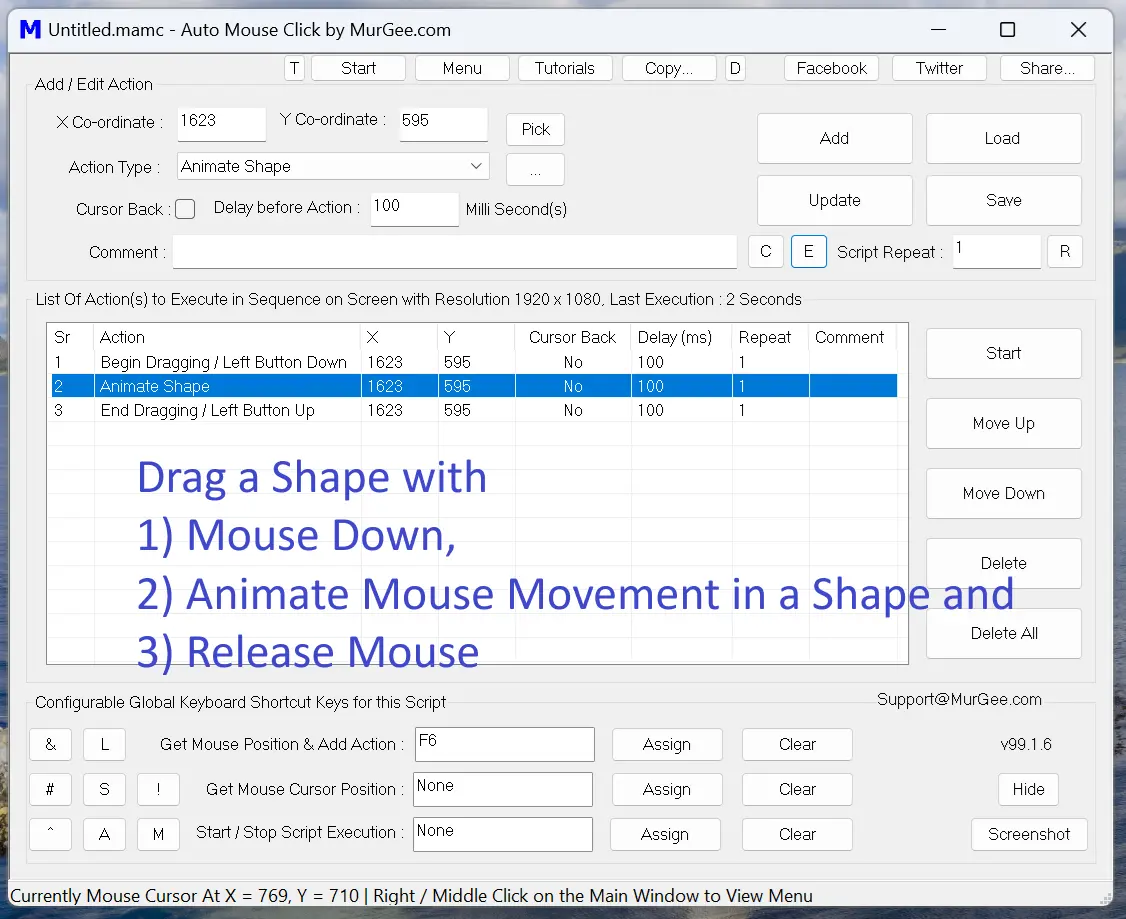
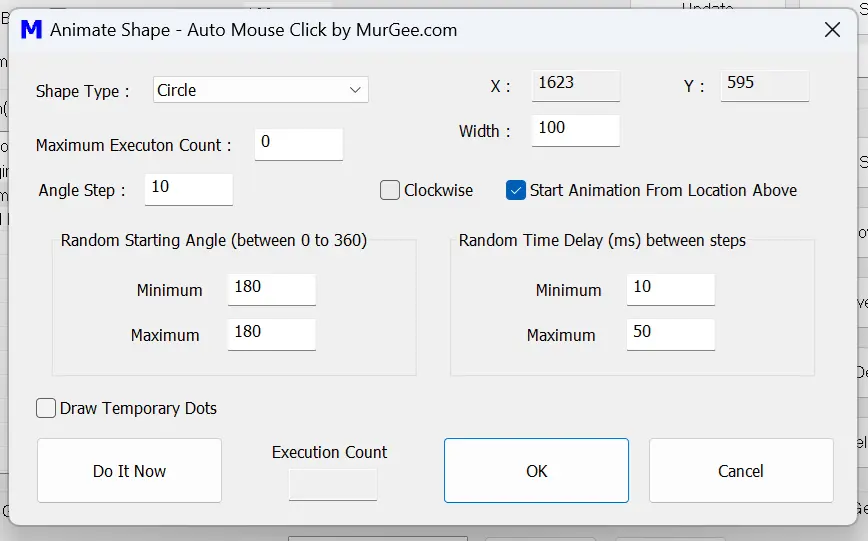
Given below Screenshot displays how you can Drag Mouse Cursor in basic shapes like Ellipse, Circle or in Rectangular manner. Note the Script is using 3 Mouse Automation Actions including Begin Mouse Dragging, Move Mouse Cursor in a Shape and finally release Mouse. When you only want to Move Mouse Cursor in a shape, you can remove Mouse Dragging Actions and Mouse Cursor will move in configured shape. To configure shape and it's parameters, you can double click on the Animate Shape Action and configure the parameters of the Mouse Automation Action.
|
|
Mouse Cursor Movement Relative to Current Mouse Cursor Position
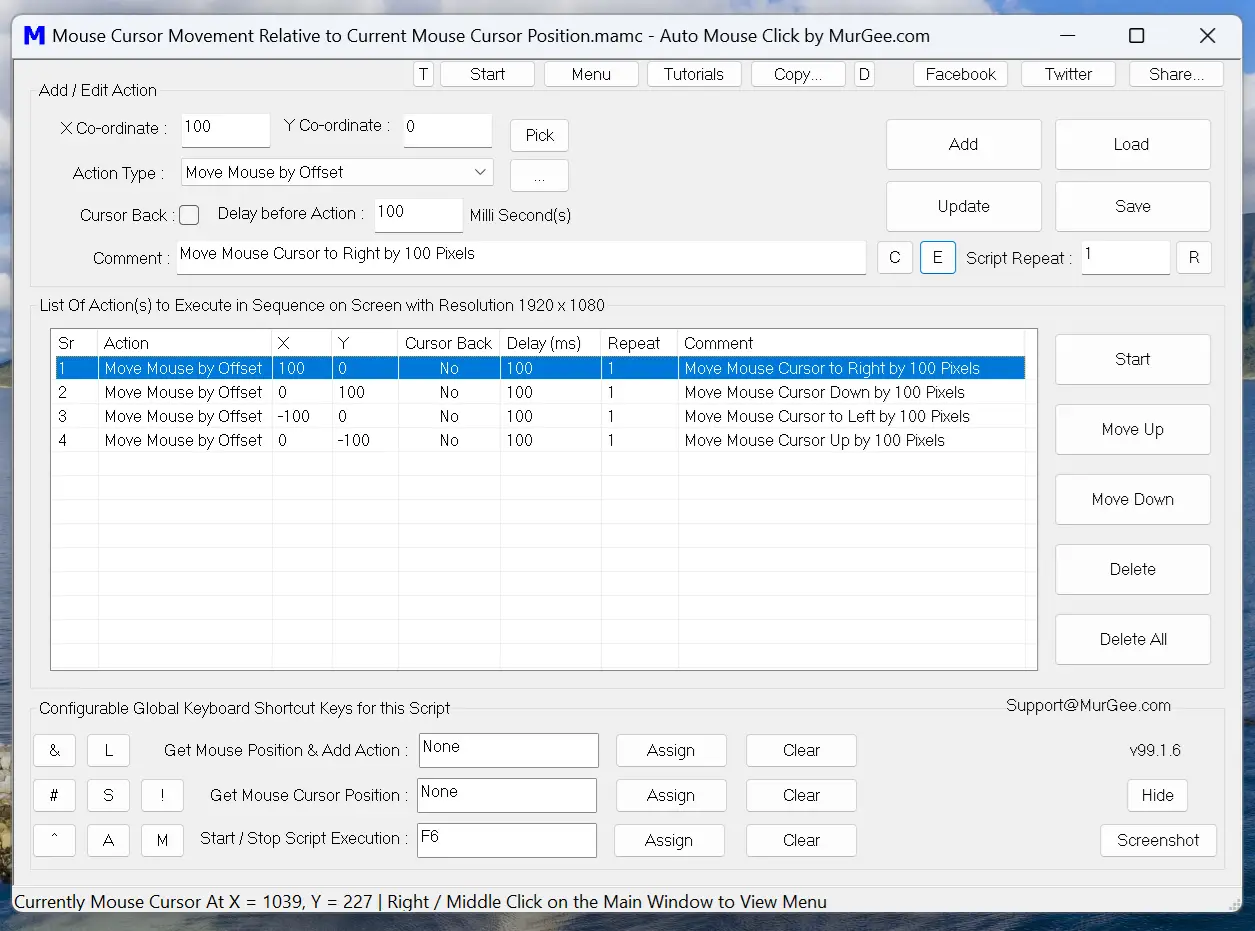
When you want to Move Mouse Cursor related to current Mouse Cursor Location, you can use Move Mouse by Offset Action. Positive value of X can be used to Move Mouse Cursor to the Right Hand side and -ve value moves Mouse Cursor to the Left. Similarly +ve value of Y, moves Mouse Cursor Downwards and -ve value of Y moves Mouse Cursor Upwards. The Script below will Move Mouse Cursor the Right by 100 Pixels, then will Move Mouse Cursor down by 100 pixels and then to the Left by 100 pixels and finally upwards by 100 pixels. Yes, there is an Animate Shape Action as mentioned earlier in this page which you can be simpler to use to Animate Mouse Cursor in a Rectangular area.
Macro Script to Move Mouse Cursor by Angle with Configurable Radius
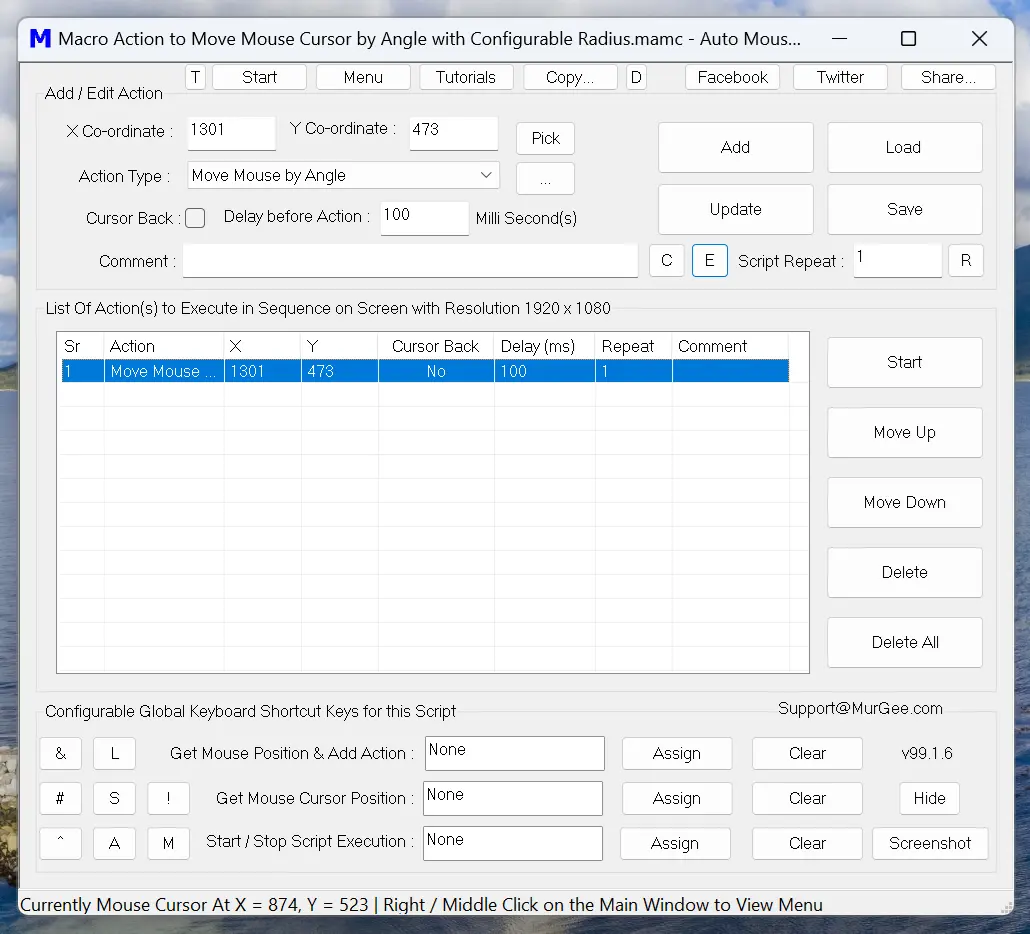
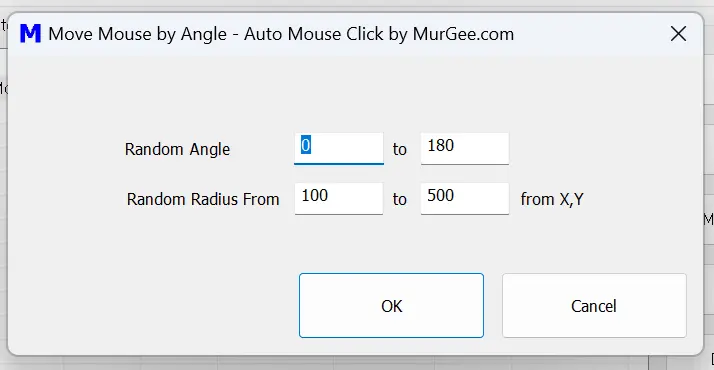
To Move Mouse Cursor using configurable Angle and Radius, you can use Move Mouse by Angle Mouse Automation Action. Random / Fixed Radius and Angle can be used to configure How new location of Mouse Cursor is calculated. To Configure Fixed Angle / Radius, fill respective values configured with from and to parameters with same values.
|
|
Click in a Random Screen Location in a Rectangular Area
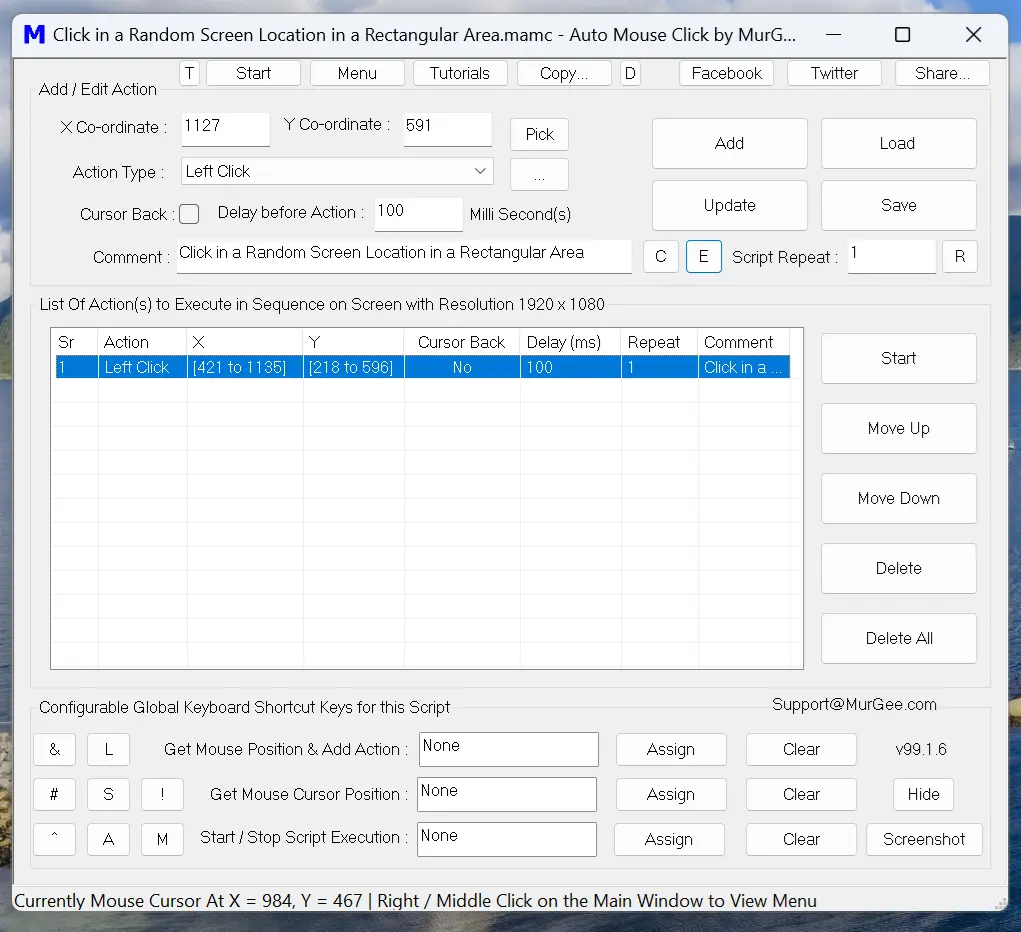
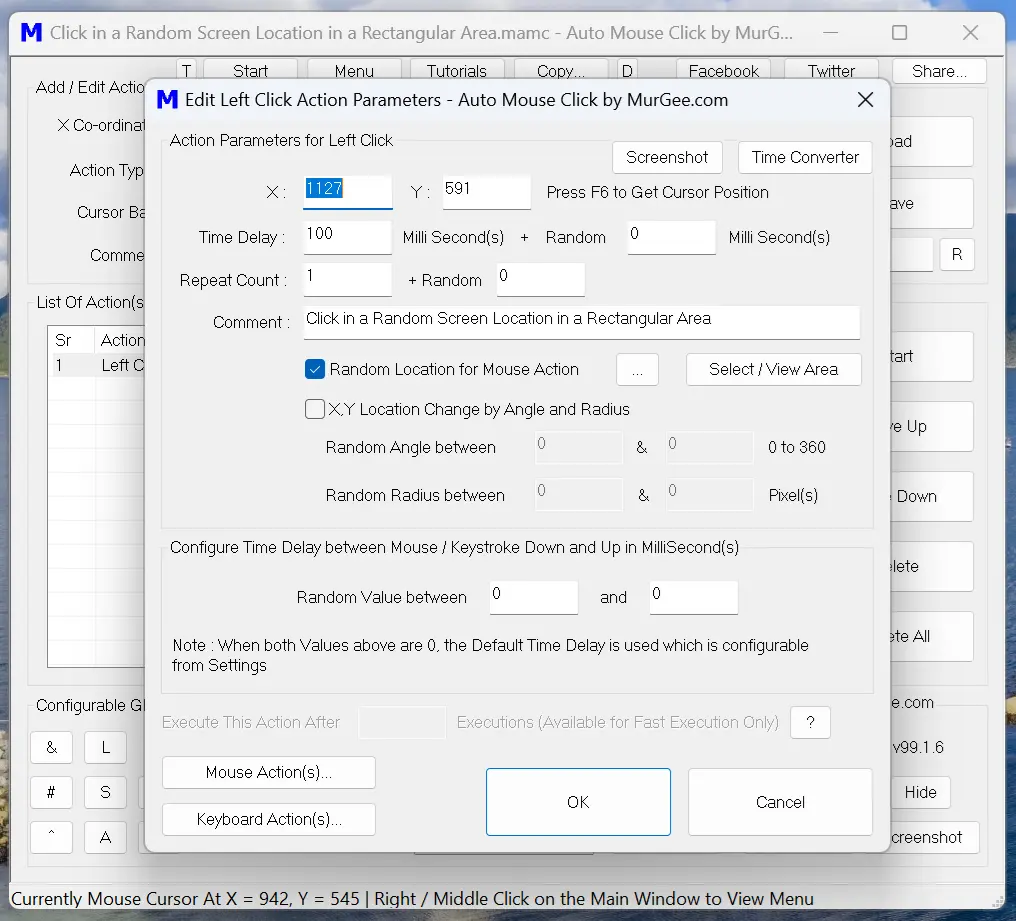
To Click in a Random Screen Location in a configurable Rectangular Area, you can double Click in the Left Click Action added to the Script and configure it's parameters to perform the Action in a Rectangular Screen Area as displayed in the screenshots below. Note the Action added to the Script displays configured values in respective X and Y column values.
 |
 |